
티스토리 뷰
[django 블로그] Post 게시물 댓글 (models.py, views.py, admin.py, 댓글 쓰기, 댓글 등록, 댓글 목록, 댓글 폼)
지휘리릭 2020. 2. 2. 20:32● 게시물 댓글
post/models.py
- 기존에 있던 class Post 밑에 추가한다.
- 댓글 객체도 Post 객체와 마찬가지로 BaseModel을 상속받아 'created_at', 'modified_at' 필드가 추가된다.
- 댓글은 누가 작성했는지 (User 객체), 어떤 게시글에 작성했는지 (Post 객체) 두 개의 필드에 대해서 외래키를 사용하며 댓글 내용은 TextField를 적용한다.
class Comment(BaseModel):
    post = models.ForeignKey(Post, on_delete = models.CASCADE)
    user = models.ForeignKey(User, on_delete = models.CASCADE)
    content = models.TextField()
post/admin.py
from django.contrib import admin
from .models import Post, Comment

admin.site.register(Post)
admin.site.register(Comment)
templates/post_detail.html
- 소셜 공유 코드 아래에 작성하면 된다.
- post/views.py/post_detail 에서 받아온 comments 댓글 목록을 for문을 이용하여 하나씩 출력한다.
- 오류가 있다면, 에러 메세지를 출력한다.
- 댓글 작성 폼 태그를 만들고 multipart/form-data 형식의 데이터를 post 방식으로 comment_write의 경로로 전달한다.
- 게시물 아이디 post.id 는 comment 객체 생성에만 필요하고 굳이 출력할 필요가 없으니 hidden type으로 설정한다.
<div class = "container">
<div class = "row">
    <div class = "col-md-12 comment-bg">
        <!--댓글 헤더-->
        <div class = "page-header">
            <h1>댓글</h1>
        </div>
        <!--댓글 목록-->
        <div class = "comments-list">
            {% for comment in comments %}
            <div class = "media">
                <div class = "media-body">
                    <h4 class = "media-heading user_name">
                        {{comment.user}}
                    </h4>
                    {{comment.content}}
                    <hr>
                </div>
            </div>
            {% endfor %}
        </div>
        <!--댓글 작성-->
        <div class = "row">
            {% if errors %}
            <ul>
                {% for error in errors %}
                <li><div class = "alert alert-primary">{{error}}</div></li>
                {% endfor %}
            </ul>
            {% endif %}
            <h3>댓글 쓰기</h3>
            <form method = "post" action = "{% url 'comment_write' %}" enctype="multipart/form-data" class = "col-lg-8 col-md-10 mx-auto">
                {% csrf_token %}
                <input type = "hidden" name = "post_id" value = "{{post.id}}">
                <div class = "form-group row">
                    <textarea class = "form-control" name = "content" rows = "7"></textarea>
                </div>
                <div class = "form-group row float-right">
                    <button type = "submit" class = "btn btn-primary">저장하기</button>
                </div>
            </form>
        </div>
    </div>
</div>
post/views.py/comment_write
- 댓글 form 에서 post_id( 해당 게시물 아이디), content ( 댓글 내용)을 가져와서 strip 함수를 사용하여 양 끝의 공백을 없애준다.
- 오류가 없다면, 댓글 객체를 생성하고 post_detail/post_id/ 주소를 만들어 해당 경로로 이동한다.
@login_required
def comment_write(request):
    errors =[]
    if request.method == 'POST':
        post_id = request.POST.get('post_id','').strip()
        content = request.POST.get('content', '').strip()

        if not content:
            errors.append("댓글을 입력하세요.")
        if not errors:
            comment = Comment.objects.create(user = request.user, post_id = post_id, content = content)
            return redirect(reverse('post_detail', kwargs = {'post_id':comment.post_id}))

    return render(request, 'post_detail.html', {'user':request.user, 'errors':errors})
post/views.py/post_detail
- comment_write 함수는 댓글 객체를 만들어주는 역할이므로 게시물 상세보기 함수에서 댓글을 보여주는 코드를 추가해야한다.
- 해당 게시물의 post.id 를 갖는 댓글만 필터링하여 comments에 저장하고 'post_detail.html' 과 함께 렌더링한다.
def post_detail(request, post_id):
    post = get_object_or_404(Post, pk = post_id)
    is_liked = False

    comments = Comment.objects.filter(post=post.id)

    if post.likes.filter(id = request.user.id).exists():
        is_liked = True

    return render(request, 'post_detail.html', context = {'post':post, 'comments':comments,
    'is_liked':is_liked, 'total_likes':post.total_likes()})
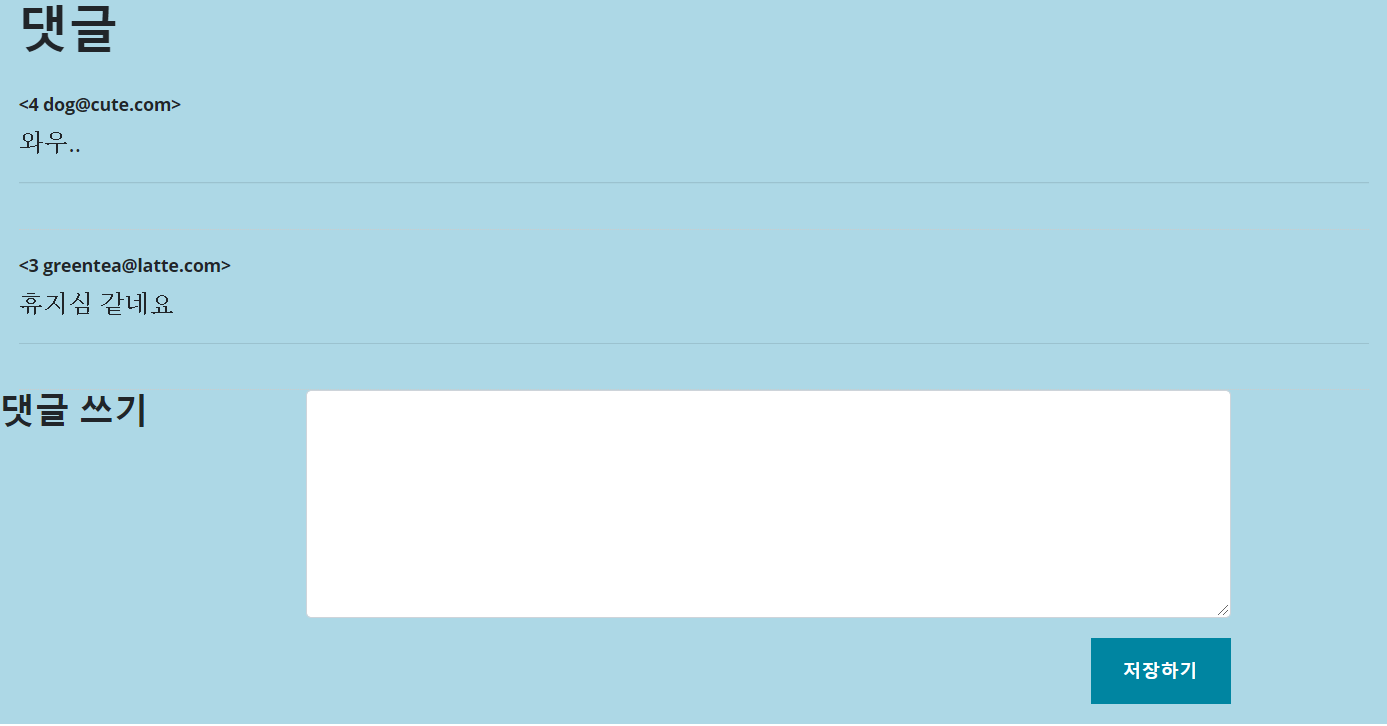
실행 결과
'django project > 블로그' 카테고리의 다른 글
- Total
- Today
- Yesterday
- django tag
- django 로그인접근
- 실시간 데이터베이스
- Django
- CellForRowAt Not Called
- django 개발일지
- 테이블출력안됨
- python 웹 배포
- CellForRowAt 호출안됨
- 까만 화면
- django pythoneverywhere
- iOS 데이터베이스
- 장고 태그달기
- pythonanywhere배포방법
- 장고 게시판
- django clean
- iOS 화면 안나옴
- django 태그
- iOS 검은 화면
- ModelForm Form 차이
- UITableViewController Not Working
- 알파벳 카운팅
- 데이터베이스 추천
- Firebase 데이터베이스 추천
- Realtime Database
- cleaned_data
- django 게시판
- 웹 배포
- iOS UITableView 출력안됨
- pythonanywhere배포
| 일 | 월 | 화 | 수 | 목 | 금 | 토 |
|---|---|---|---|---|---|---|
| 1 | 2 | 3 | ||||
| 4 | 5 | 6 | 7 | 8 | 9 | 10 |
| 11 | 12 | 13 | 14 | 15 | 16 | 17 |
| 18 | 19 | 20 | 21 | 22 | 23 | 24 |
| 25 | 26 | 27 | 28 | 29 | 30 | 31 |